Prog Vision Painting

Categories
Painting Tips

Will Roller Marks Go Away When Paint Dries?

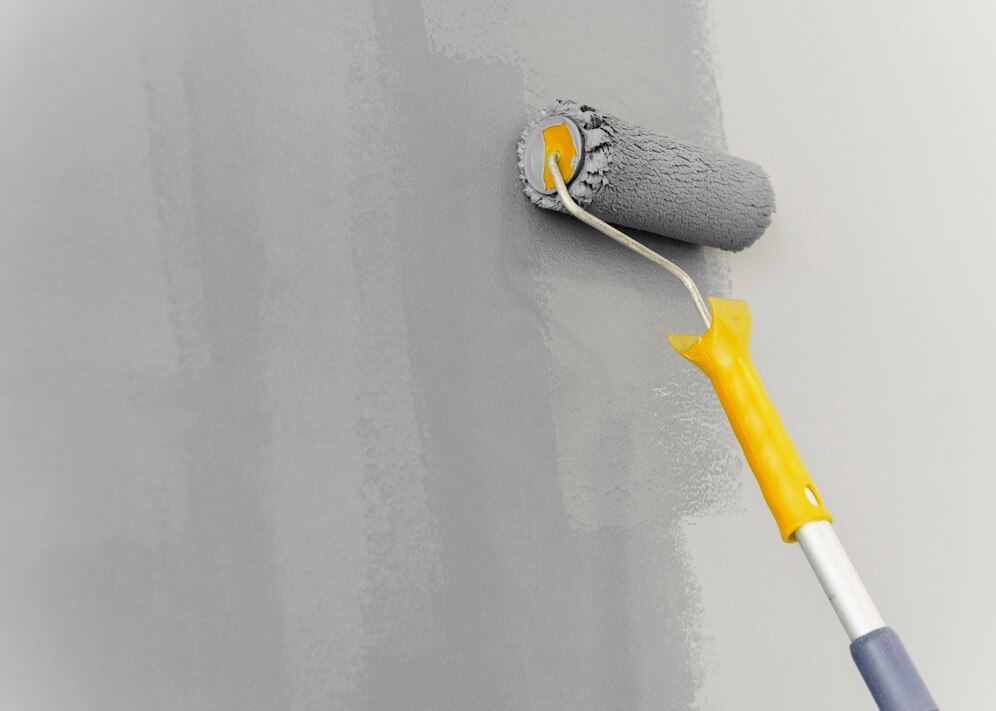
When undertaking a painting project, one of the common concerns is the appearance of roller marks, also known as “lap marks” or “streaks.” These marks can mar the otherwise smooth finish of a freshly painted wall. The question many painters ask is: will roller marks go away when the paint dries? The answer can vary based on several factors. Let’s explore this in detail.

Understanding Roller Marks

What Are Roller Marks?

  • Definition: Roller marks are streaks or lines that appear on the painted surface, often caused by uneven application of paint with a roller.
  • Causes: These marks can result from several issues, such as overloading or underloading the roller with paint, applying uneven pressure, or painting in inconsistent directions.

Will Roller Marks Disappear?

Possibility of Disappearance:

  • Drying and Leveling: In some cases, roller marks may become less noticeable as the paint dries. High-quality paint with self-leveling properties can help smooth out minor imperfections.
  • Paint Type: Certain paints, especially those with a matte or flat finish, are more forgiving and can hide roller marks better than glossy or semi-gloss paints.

Factors Affecting Persistence:

  • Paint Quality: High-quality paints are formulated to minimize lap marks and provide a more uniform finish.
  • Application Technique: Proper application techniques play a significant role in preventing roller marks. Consistent pressure and overlapping strokes are crucial.
  • Environmental Conditions: The temperature and humidity in the room can affect how the paint dries and settles, potentially reducing or exacerbating roller marks.

Tips to Prevent Roller Marks

  1. Proper Loading of the Roller:
    • Even Coating: Load the roller evenly with paint to ensure smooth application. Avoid overloading or underloading the roller.
    • Use a Paint Grid: A paint grid in your paint tray can help distribute the paint more evenly on the roller.
  2. Maintain a Wet Edge:
    • Overlap Strokes: Always overlap your strokes slightly and maintain a wet edge to prevent lap marks. This means working in small sections and not allowing the paint to dry before overlapping.
  3. Consistent Pressure and Direction:
    • Even Pressure: Apply consistent pressure on the roller to avoid streaks. Varying pressure can lead to uneven paint distribution.
    • Roll in the Same Direction: Roll in the same direction for each section to ensure a uniform finish.
  4. Use the Right Tools:
    • High-Quality Roller Covers: Invest in high-quality roller covers suited to the type of paint and surface you are working on. The nap length should match the texture of the wall.
    • Extension Poles: Use extension poles for better control and to apply even pressure.
  5. Appropriate Environmental Conditions:
    • Optimal Temperature and Humidity: Ensure the room is at the right temperature and humidity level for painting. Extreme conditions can affect drying times and paint consistency.

Fixing Roller Marks After Painting

If roller marks are visible after the paint has dried, you can still address them:

  1. Light Sanding:
    • Smooth the Surface: Lightly sand the affected areas with fine-grit sandpaper to smooth out the marks.
  2. Touch-Up Painting:
    • Reapply Paint: Use a small roller or brush to reapply paint to the sanded areas, blending it into the surrounding paint.
  3. Repaint the Wall:
    • Second Coat: If the roller marks are widespread, consider applying a second coat of paint using proper techniques to achieve a smooth finish.

Roller marks may not always disappear completely when paint dries, but using high-quality paint, proper tools, and correct techniques can significantly reduce their appearance. By paying attention to loading the roller evenly, maintaining a wet edge, applying consistent pressure, and ensuring optimal environmental conditions, you can achieve a smooth and professional-looking paint job. If roller marks do persist, they can often be corrected with light sanding and touch-up painting.

Categories
Painting Tips

Do You Paint the Edges of a Wall First?

When it comes to painting a room, the order in which you paint can significantly impact the final result. One common question is whether you should paint the edges of a wall first. The short answer is yes, and here’s why.

Why Paint the Edges First?

Precision and Clean Lines:

  • Better Control: Using a brush to paint the edges first, a technique known as “cutting in,” allows for greater control. This ensures that you can carefully navigate around corners, trim, and the ceiling line.
  • Sharp Edges: By cutting in first, you create a clean border that the roller can blend into, resulting in sharp, professional-looking edges.

Avoiding Mess and Overlap:

  • Prevents Splatter: Rolling paint can sometimes cause splatters. By cutting in first, you can avoid getting paint on areas you don’t want to be covered, like the trim or ceiling.
  • Seamless Blend: Painting the edges first allows the rolled paint to blend smoothly into the brushed areas, avoiding visible overlap lines.

How to Paint the Edges

Step-by-Step Process:

  1. Preparation:
    • Clean and Tape: Clean the walls to remove dust and dirt. Use painter’s tape to mask off trim, baseboards, and the ceiling to protect them from paint.
    • Gather Supplies: Use high-quality brushes designed for cutting in, which typically have angled bristles for better control.
  2. Cutting In:
    • Load the Brush: Dip your brush into the paint, tapping off excess to avoid drips.
    • Paint the Edges: Start at the top corner of the wall. Paint a 2-3 inch wide strip along the edges, carefully following the line of the ceiling, corners, and trim.
    • Feather the Edges: Use smooth, even strokes to feather the paint slightly onto the wall. This will help blend the edges when you start rolling.
  3. Rolling the Walls:
    • Load the Roller: Pour paint into a tray and evenly load your roller.
    • Apply Paint: Start in the center of the wall and roll in a “W” or “M” pattern to evenly distribute the paint. Then fill in the gaps with horizontal strokes.
    • Blend the Edges: Roll as close to the edges as possible, blending the rolled paint with the cut-in areas to create a seamless finish.

Tips for Success

  • Maintain a Wet Edge: Work in sections and maintain a wet edge to prevent lap marks. This means overlapping your strokes slightly before the paint dries.
  • Use Consistent Techniques: Apply consistent pressure and brush strokes when cutting in and rolling to ensure an even finish.
  • Take Breaks: If you’re painting a large area, take breaks and step back to inspect your work. This helps catch any missed spots or drips before the paint dries.

Painting the edges of a wall first, or cutting in, is a crucial step for achieving a clean, professional finish. It allows for greater precision, prevents mess, and ensures that the rolled paint blends seamlessly into the edges. By following the proper techniques and tips, you can transform any room with a smooth and flawless coat of paint.

Categories
Painting Tips

Is it OK to Cut In One Day and Paint the Next

When tackling a painting project, one common question is whether it’s acceptable to cut in one day and paint the next. Cutting in involves painting the edges and corners of walls with a brush before using a roller for the larger areas. Here’s a detailed look at the pros and cons of this approach, along with some tips to ensure the best results.

The Benefits of Cutting In and Painting on Different Days

  1. Reduced Fatigue:
    • Manageable Workload: Painting can be a physically demanding task. By cutting in one day and rolling the next, you break down the job into more manageable steps, reducing fatigue and helping maintain precision and quality.
  2. Improved Focus:
    • Better Results: Focusing on one task at a time can improve the quality of your work. When you cut in one day, you can concentrate on achieving clean, sharp lines. The next day, you can focus on evenly rolling the paint on larger areas.
  3. Adequate Drying Time:
    • Prevents Smudging: Allowing the cut-in areas to dry overnight can prevent accidental smudging when you start rolling the walls. This is especially beneficial when using contrasting colors.

Potential Drawbacks

  1. Visible Lines:
    • Risk of Lap Marks: If the cut-in paint dries completely, there’s a risk of visible lines where the brushed and rolled areas meet. To minimize this, try to blend the edges of the cut-in areas with the roller paint the next day.
  2. Consistency Issues:
    • Color and Sheen Variation: If you’re not careful, there might be slight variations in color and sheen between the cut-in and rolled areas. Using the same batch of paint and ensuring thorough mixing can help maintain consistency.

Tips for Successful Painting

  1. Use Quality Tools:
    • High-Quality Brushes and Rollers: Invest in good-quality brushes for cutting in and rollers for large areas. This ensures smoother application and better overall results.
  2. Blend Edges:
    • Feather the Paint: When cutting in, slightly feather the edges into the wall. This helps blend the brushed edges with the roller paint seamlessly.
  3. Maintain a Wet Edge:
    • Overlap Areas: When you start rolling the next day, slightly overlap the previously cut-in areas to blend the two seamlessly. This helps avoid noticeable lines.
  4. Consistent Technique:
    • Use the Same Technique: Apply the same painting technique, pressure, and direction when cutting in and rolling to ensure a consistent finish.
  5. Keep the Room Conditions Stable:
    • Control Temperature and Humidity: Stable room conditions help the paint dry evenly, reducing the risk of visible differences between the cut-in and rolled areas.

It is generally acceptable to cut in one day and paint the next. This approach can make the painting process more manageable and allow you to focus on each task more effectively. However, it’s essential to take precautions to ensure a seamless finish. By using quality tools, blending edges, maintaining a wet edge, and keeping room conditions stable, you can achieve professional-looking results even when spreading the work over two days.

Categories
Painting Tips

How do I start painting with no experience?

Starting a painting project with no prior experience can seem daunting, but with the right preparation and techniques, anyone can achieve professional-looking results. Here’s a comprehensive guide to help you get started.

Step 1: Gather Your Supplies

Having the right tools and materials is crucial for a successful painting project. Here’s what you’ll need:

  • Paint: Choose high-quality paint suitable for your project, whether it’s for walls, trim, or furniture.
  • Primer: Use primer to cover dark colors, stains, or to prepare new surfaces.
  • Paint Brushes: Invest in a variety of brushes for cutting in edges and painting small areas.
  • Paint Rollers: Choose rollers with the appropriate nap length for your surface texture.
  • Painter’s Tape: Use painter’s tape to protect edges and create clean lines.
  • Drop Cloths: Protect your floors and furniture from paint splatters.
  • Paint Trays: Use trays to hold and evenly distribute paint on your rollers.
  • Sandpaper: Prepare surfaces by sanding them smooth.
  • Putty Knife and Spackle: Repair any holes or cracks before painting.

Step 2: Prepare the Room

Proper preparation is key to a successful paint job:

  1. Clear the Room: Remove or cover furniture and protect the floor with drop cloths.
  2. Clean Surfaces: Dust and clean the walls, ceiling, and trim to remove dirt and cobwebs.
  3. Repair Damage: Use a putty knife and spackle to fill holes and cracks. Once dry, sand the areas smooth.
  4. Tape Off Areas: Apply painter’s tape to trim, baseboards, and any areas you want to protect from paint.

Step 3: Prime the Surfaces

Priming is an important step, especially if you’re painting over a dark color or a new surface:

  1. Apply Primer: Use a brush to cut in the edges, then a roller to cover larger areas. Allow the primer to dry completely.
  2. Sand Lightly: Once the primer is dry, lightly sand the surfaces to ensure a smooth finish.

Step 4: Cutting In

Cutting in involves painting the edges and corners where rollers can’t reach:

  1. Use a Brush: Dip a high-quality brush into the paint, tapping off excess.
  2. Paint Edges: Carefully paint a 2-3 inch strip along the edges, corners, and around trim. This creates a border for rolling.
  3. Blend Edges: Slightly overlap your strokes onto the wall to blend the edges seamlessly.

Step 5: Rolling the Walls

Using a roller is the most efficient way to cover large areas:

  1. Load the Roller: Pour paint into a tray and roll the roller in the paint until it’s evenly coated.
  2. Apply Paint: Start rolling the paint in a “W” or “M” pattern to distribute it evenly, then fill in the gaps with horizontal strokes.
  3. Work in Sections: Paint one small section at a time, maintaining a wet edge to avoid lap marks.

Step 6: Applying Additional Coats

Most paint jobs require at least two coats for full coverage:

  1. Allow to Dry: Let the first coat dry completely before applying a second coat.
  2. Repeat Process: Cut in and roll the second coat following the same steps as the first.

Step 7: Finishing Touches

After the paint has dried, it’s time for the final touches:

  1. Remove Tape: Carefully remove painter’s tape before the paint is fully dry to avoid peeling.
  2. Inspect and Touch Up: Look for any missed spots or uneven areas and touch them up as needed.
  3. Clean Up: Wash brushes and rollers immediately after use, and store leftover paint properly.

Tips for Success

  • Take Your Time: Rushing can lead to mistakes. Work slowly and carefully.
  • Work in Good Lighting: Ensure you have adequate lighting to see the true color and any missed spots.
  • Ventilate the Room: Proper ventilation helps the paint dry and reduces fumes.
  • Practice: If you’re unsure, practice on a small area or a piece of cardboard before tackling the main project.

Starting a painting project with no experience can be a rewarding endeavor with the right preparation and techniques. By gathering the necessary supplies, properly preparing the room, and following step-by-step instructions, you can achieve a professional-looking finish. Remember to take your time, work methodically, and enjoy the process of transforming your space.

Categories
Painting Tips

Do I need to cut in twice when painting?

Cutting in is a crucial step in the painting process that involves painting the edges and corners of walls, where rollers can’t reach. This technique ensures clean lines and a professional finish. But a common question arises: Do you need to cut in twice when painting? Let’s explore the reasons and scenarios where double cutting in might be necessary.

What is Cutting In?

Cutting in refers to the process of painting the edges and corners of a room with a brush before using a roller for the larger areas. This helps achieve sharp lines between different surfaces, such as between walls and ceilings, or around trim and baseboards.

When to Cut In Twice

  1. Color Change:
    • Significant Color Change: If you’re painting over a drastically different color, cutting in twice ensures full coverage. Dark colors can often bleed through a single coat of lighter paint.
    • Consistency in Appearance: To maintain consistency in texture and color, cutting in twice helps to blend the edges with the rolled sections.
  1. Coverage and Opacity:
    • Poor Coverage: If your paint has poor coverage or you’re using a lighter color over a darker one, the first coat might not be enough. Cutting in twice ensures the old color is fully covered.
    • Achieving True Color: Some colors, particularly lighter shades, may require more than one coat to achieve their true hue. Cutting in twice helps to achieve the desired color.
  1. High-Contrast Edges:
    • Sharp Lines: When painting areas with high-contrast edges, such as a white wall against a dark trim, cutting in twice helps achieve sharper lines and better definition.
    • Precision: Ensuring precision with two coats can help eliminate any visible brush strokes and create a smoother finish.
  1. Paint Quality:
    • Quality of Paint: Higher quality paints often provide better coverage with fewer coats. However, if you’re using a budget or lower-quality paint, cutting in twice may be necessary to achieve even coverage.
    • Primer and Paint in One: Even with paint-and-primer-in-one products, two coats might be needed to ensure durability and depth of color.

Steps for Cutting In

  1. Preparation:
    • Tape off areas where you don’t want paint, such as trim, baseboards, and ceilings.
    • Use drop cloths to protect floors and furniture.
  2. First Cut-In:
    • Load your brush with paint and carefully paint a 2-3 inch strip along the edges, corners, and trim.
    • Blend the edges slightly with the larger wall area to avoid noticeable lines.
  3. Roll the Walls:
    • Once the first cut-in has dried, use a roller to paint the larger areas of the wall. Blend into the edges to smooth out any transitions.
  4. Second Cut-In:
    • After the first coat has dried completely, repeat the cutting-in process. This second cut-in ensures complete coverage and a clean finish.
  5. Final Roll:
    • Roll the walls again after the second cut-in has dried. This helps to blend the cut-in areas seamlessly with the rest of the wall.

Whether you need to cut in twice when painting depends on various factors such as the color change, coverage, quality of paint, and the need for sharp lines. In many cases, especially when covering dark colors with lighter shades or when seeking a high-quality finish, cutting in twice is recommended. This ensures full coverage, consistent color, and a professional-looking result. By following the steps for cutting in carefully, you can achieve clean, sharp edges and a beautifully painted room.

Categories
Painting Tips

Why do painters paint the ceiling first?

When embarking on an interior painting project, professional painters often start with the ceiling before moving on to the walls and trim. This sequence may seem counterintuitive to some, but there are several compelling reasons for this approach. Here’s a detailed look at why painters paint the ceiling first.

1. Preventing Drips and Spatters

Gravity’s Role:

  • When painting a ceiling, gravity inevitably causes paint drips and splatters. By starting with the ceiling, any drips that land on the walls or floor can be easily covered up when painting the walls later.
  • Painting the ceiling first ensures that any mess made during this process doesn’t ruin a freshly painted wall or trim.

2. Creating a Smooth Transition

Seamless Edges:

  • Painting the ceiling first allows painters to achieve a cleaner, more seamless transition between the ceiling and the walls. If ceiling paint overlaps onto the top of the walls, it can be easily covered when the walls are painted.
  • This approach helps in creating sharp, clean lines where the ceiling meets the walls, enhancing the overall appearance of the room.

3. Efficiency and Time-Saving

Logical Workflow:

  • Starting with the ceiling and working downwards follows a logical sequence that minimizes the need for additional preparation and cleaning. It streamlines the process and reduces the risk of damaging freshly painted surfaces.
  • This method allows painters to tape off areas only once, rather than having to retape and touch up different sections multiple times.

4. Better Coverage and Finish

Avoiding Lap Marks:

  • Ceilings often require more effort to paint evenly due to their position and the angle at which the paint is applied. By tackling the ceiling first, painters can focus on achieving a uniform finish without worrying about protecting freshly painted walls.
  • Applying primer and paint to the ceiling first helps in ensuring that it receives adequate coverage, especially if it’s a different color or requires multiple coats.

5. Safety and Convenience

Working Comfortably:

  • Painting a ceiling first means the room is usually free of obstacles and furniture that might get in the way. This makes it easier to use ladders or scaffolding and ensures better safety for the painter.
  • An empty or minimally furnished room reduces the risk of accidents and makes the job more comfortable and efficient.

6. Highlighting Imperfections

Identifying Issues Early:

  • Painting the ceiling first can help in identifying any imperfections in the room’s overall appearance early in the process. Uneven textures or missed spots on the ceiling can be addressed before moving on to the walls, ensuring a flawless finish.

Steps for Painting a Ceiling First

  1. Prepare the Room:
    • Remove or cover furniture and flooring with drop cloths. Ensure the room is well-ventilated.
  2. Clean the Ceiling:
    • Dust and clean the ceiling to remove dirt and cobwebs.
  3. Repair Imperfections:
    • Fill any cracks or holes with spackle, then sand smooth.
  4. Prime the Ceiling:
    • Apply a primer if necessary, particularly if there are stains or if you’re changing the color significantly.
  5. Paint the Ceiling:
    • Use a roller with an extension pole to apply paint in long, even strokes. Start near the main light source and work your way across the room.

Painting the ceiling first is a strategic approach that professional painters use to achieve the best possible results. This method prevents drips and splatters on freshly painted walls, creates clean transitions, saves time, ensures better coverage, and enhances safety and convenience. By following this sequence, painters can deliver a flawless and professional finish, making the entire painting process more efficient and effective.

Categories
Painting Tips

What direction do you paint a ceiling?

Painting a ceiling can be a daunting task, but knowing the right techniques and direction to paint can make the job much easier and result in a professional finish. Here’s a detailed guide on the best direction to paint a ceiling.

Preparation Before Painting

Before starting the painting process, proper preparation is crucial:

  1. Clear the Room: Remove furniture and cover the floor with drop cloths to protect against paint splatters.
  2. Clean the Ceiling: Dust and clean the ceiling to remove any dirt or cobwebs. A clean surface helps the paint adhere better.
  3. Repair Imperfections: Fill any cracks or holes with spackle, then sand smooth once dry.
  4. Prime the Ceiling: Apply a primer if the ceiling has stains, is newly repaired, or if you are making a drastic color change.

Choosing the Right Direction

  1. Determine the Light Source:
    • Natural Light: The direction of natural light entering the room plays a significant role in how the paint finish will look. Paint parallel to the main source of natural light (usually the largest window) to minimize the appearance of shadows and streaks.
    • Artificial Light: If the room relies more on artificial light, consider the position of the light fixtures and paint in a direction that follows the main light path.
  1. Start at the Perimeter:
    • Begin by “cutting in” the edges where the ceiling meets the walls. Use a brush to paint a 2-3 inch strip around the perimeter. This helps create a border that you can blend with your roller later.
  1. Roller Application:
    • First Coat: For the first coat, start at one corner of the ceiling and work your way across the room. Use a roller attached to an extension pole and paint in long, overlapping strokes parallel to the direction of the main light source. This helps reduce lap marks and ensures a more uniform finish.
    • Second Coat: Apply the second coat perpendicular to the first coat. This crosshatch technique helps cover any missed spots and provides even coverage.

Technique Tips

  1. Maintain a Wet Edge: Keep a wet edge to avoid lap marks. This means overlapping each stroke with the previous one before it dries.
  2. Use the Right Roller: Choose a roller with the appropriate nap length for your ceiling texture. A thicker nap is better for textured ceilings, while a shorter nap works well for smooth ceilings.
  3. Apply Even Pressure: Use even pressure when rolling to distribute the paint uniformly. Avoid pressing too hard, which can cause streaks.
  4. Feather the Edges: Lightly feather the edges of your strokes to blend them seamlessly. This helps in achieving a smooth finish without visible lines.

Final Touches

  1. Inspect the Ceiling: After the paint dries, inspect the ceiling for any missed spots or uneven areas. Touch up as needed.
  2. Clean Up: Remove any painter’s tape from the edges before the paint fully dries to avoid peeling off the paint. Clean your brushes, rollers, and trays thoroughly.

Painting a ceiling involves careful preparation and the right techniques to ensure a smooth, professional finish. By painting parallel to the main light source and using a crosshatch technique for multiple coats, you can minimize streaks and achieve even coverage. Proper preparation, such as cleaning, priming, and cutting in the edges, also plays a crucial role in the final result. With these tips, painting your ceiling can become a more manageable and successful project.

Categories
Painting Tips

What time of year should you paint your house?

Choosing the right time to paint your house is crucial for achieving the best results. The weather conditions, temperature, and humidity can all impact the quality and durability of your paint job. Here’s a detailed guide to help you decide the best time of year to paint your house.

Ideal Weather Conditions for Painting

Temperature:

  • Optimal Range: The best temperature for painting exteriors typically falls between 50°F and 85°F (10°C to 29°C). Paints have different formulations, so always check the manufacturer’s recommendations.
  • Consistency: Sudden temperature changes can cause paint to dry improperly, leading to cracking or peeling.

Humidity:

  • Moderate Humidity: Ideal humidity levels for painting are between 40% and 70%. High humidity can prolong drying times and affect the paint’s adhesion.
  • Avoid High Humidity: Painting in high humidity can cause paint to take longer to dry and can result in a patchy finish. Similarly, low humidity can cause paint to dry too quickly, leading to brush marks and an uneven surface.

Seasonal Considerations

Spring:

  • Pros: Spring offers mild temperatures and moderate humidity, making it an excellent time for painting. Additionally, spring rains can wash away pollen and dust, resulting in cleaner surfaces to paint.
  • Cons: Unpredictable weather and sudden rain showers can disrupt the painting process.

Summer:

  • Pros: Summer provides long days and consistently warm weather, allowing for extended painting hours.
  • Cons: Extremely high temperatures can cause paint to dry too quickly, leading to imperfections. Additionally, summer can bring high humidity levels in some regions.

Fall:

  • Pros: Fall is often considered the best time to paint due to stable temperatures and lower humidity. The cooler weather ensures paint adheres properly and dries evenly.
  • Cons: As fall progresses, temperatures can drop quickly, so it’s important to complete the project before it gets too cold.

Winter:

  • Pros: In mild climates, winter can be a good time for painting due to lower humidity and fewer insects.
  • Cons: Cold temperatures can prevent paint from curing properly. Additionally, shorter days mean less daylight for working.

Regional Considerations

Northern Climates:

  • Best Time: Late spring to early fall. The weather is warm enough for paint to dry properly, but not too hot.
  • Challenges: Shorter painting season due to colder temperatures.

Southern Climates:

  • Best Time: Early spring and late fall. These times offer cooler temperatures and lower humidity compared to summer.
  • Challenges: High summer temperatures and humidity can complicate the painting process.

Coastal Areas:

  • Best Time: Late spring to early fall, similar to northern climates.
  • Challenges: High humidity and salty air can impact paint durability and adhesion.

Additional Tips for Painting Your House

  1. Preparation is Key: Regardless of the time of year, thorough surface preparation is essential. Clean surfaces, scrape off old paint, and repair any damage before painting.
  2. Monitor the Weather: Keep an eye on the weather forecast. Avoid painting before, during, or immediately after rain.
  3. Use Quality Materials: Invest in high-quality paint and materials designed for your specific climate and conditions.
  4. Plan for Drying Time: Ensure you have enough time for each coat to dry completely before applying the next. This is especially important in cooler or more humid weather.
  5. Consider Professional Help: If you’re unsure about the best time to paint or the proper techniques, hiring a professional can ensure a high-quality, long-lasting finish.

The best time of year to paint your house depends on your local climate and weather patterns. Generally, late spring to early fall offers the most favorable conditions, with mild temperatures and moderate humidity. By considering these factors and planning accordingly, you can achieve a beautiful and durable paint job that enhances your home’s appearance and value.

Categories
Painting Tips

Do you paint trim or walls first?

When tackling a painting project, one common question is whether to paint the trim or the walls first. The sequence can affect both the efficiency and the final look of your work. Here’s a comprehensive guide to help you decide the best approach:

Painting Trim First

Advantages:

  1. Easier to Tape Off Trim: When the trim is painted first, it’s simpler to tape off the edges once it’s dry. This makes it easier to get a clean line between the trim and the walls.
  2. Clean Lines: Since trim usually requires more precise painting, doing it first allows you to focus on getting a neat, sharp edge. Any paint that spills onto the walls can be easily covered when you paint the larger wall areas.
  3. Time Efficiency: Trim is typically painted with smaller brushes, which can be more time-consuming. Getting the detail work out of the way first can make painting the larger wall areas feel like it goes by faster.

Disadvantages:

  1. Potential for Touch-Ups: There might be a need for touch-ups on the trim if wall paint splatters or drips on it.
  2. Requires Careful Taping: After the trim is painted, you need to ensure that the tape you use doesn’t peel off any fresh paint.

Painting Walls First

Advantages:

  1. Speed: Painting walls first is generally quicker since you’re covering larger areas with rollers. It’s less detail-oriented compared to painting trim.
  2. Less Taping: When you paint the walls first, there’s less precise taping involved, which can save time.
  3. Avoids Excessive Touch-Ups: Painting the larger surfaces first can help avoid the need for as many touch-ups on the trim.

Disadvantages:

  1. Difficult to Tape Off Walls: Once the walls are painted, it can be trickier to tape off the walls neatly to paint the trim without the tape lifting wall paint.
  2. Potential for Mess: When painting trim after the walls, there’s a higher risk of trim paint getting onto the freshly painted walls, leading to more touch-ups.

Expert Recommendations

Many professional painters prefer to paint the trim first. Here’s why:

  • Neatness: Trim requires more precision. Doing this detail-oriented work first ensures that any mistakes can be easily covered up when painting the walls.
  • Efficiency: Once the trim is done and dry, taping it off is simpler and usually results in cleaner lines.
  • Minimal Touch-Ups: Professionals often find that they need fewer touch-ups when they paint the trim first.

Tips for Success

Regardless of the sequence you choose, here are some tips to ensure a professional-looking finish:

  1. Use Quality Painter’s Tape: High-quality tape can help achieve clean lines and minimize paint bleeding.
  2. Let Paint Dry Completely: Ensure each coat is thoroughly dry before applying tape or painting adjacent areas.
  3. Protect Floors and Furniture: Use drop cloths and plastic sheeting to protect surfaces from paint splatters.
  4. Work in Sections: Breaking the project into sections can make it more manageable and reduce the risk of errors.
  5. Patience and Precision: Taking your time with both the trim and the walls will yield the best results.

Deciding whether to paint the trim or the walls first depends on your priorities and painting style. Painting the trim first is often recommended for achieving cleaner lines and a more professional finish. However, if you’re looking for speed and less detailed work initially, painting the walls first can be a viable option. Whichever method you choose, careful preparation and attention to detail will ensure a beautiful and polished result.

Categories
Painting Tips

What time of day should you paint your house?

Choosing the right time of day to paint your house can make a significant difference in the quality and durability of the paint job. Here’s a guide to help you decide:

Morning Hours:

  • Advantages: Painting in the morning, typically between 10:00 AM and 2:00 PM, is often recommended. The weather tends to be cooler, with lower humidity levels, which allows the paint to dry more evenly and prevents it from drying too quickly or forming bubbles.
  • Optimal Conditions: During the morning, the sun is not yet at its peak intensity, reducing the risk of premature drying and potential color inconsistencies. Additionally, morning light provides better visibility, making it easier to identify imperfections and ensure thorough coverage.

Afternoon Hours:

  • Considerations: While painting in the afternoon is still feasible, it’s essential to be mindful of the weather conditions. Avoid painting during the hottest part of the day, typically between 2:00 PM and 4:00 PM, to prevent the paint from drying too quickly and causing issues such as blistering or cracking.
  • Shade Availability: If possible, choose areas of the house that are shaded during the afternoon to minimize exposure to direct sunlight, which can accelerate paint drying and affect the finish quality.

Evening Hours:

  • Limited Recommendation: Painting in the evening is generally not advisable, especially during the late evening or nighttime hours. The decreasing temperatures and rising humidity levels can impede proper paint drying and adhesion, leading to potential issues with curing and long-term durability.
  • Exception: In certain circumstances, such as painting in regions with extreme daytime temperatures or scheduling constraints, painting in the early evening may be acceptable. However, it’s essential to ensure adequate time for the paint to dry before nighttime dew or condensation forms.

Overall Considerations:

  • Weather Forecast: Before starting the painting project, check the weather forecast for the day to identify optimal conditions, including temperature, humidity, and the likelihood of precipitation.
  • Surface Temperature: Regardless of the time of day, avoid painting surfaces that are too hot or too cold, as extreme temperatures can affect paint adhesion and drying times.
  • Proper Preparation: Regardless of the time chosen for painting, ensure thorough surface preparation and use high-quality paint and tools to achieve the best results.

By selecting the appropriate time of day and considering weather conditions, you can optimize the painting process and achieve a professional-quality finish for your house.

Choosing the right time of day to paint your house can significantly impact the outcome of your project. If you’re considering professional assistance, click here if you are looking for a professional Santa Barbara painting contractor.